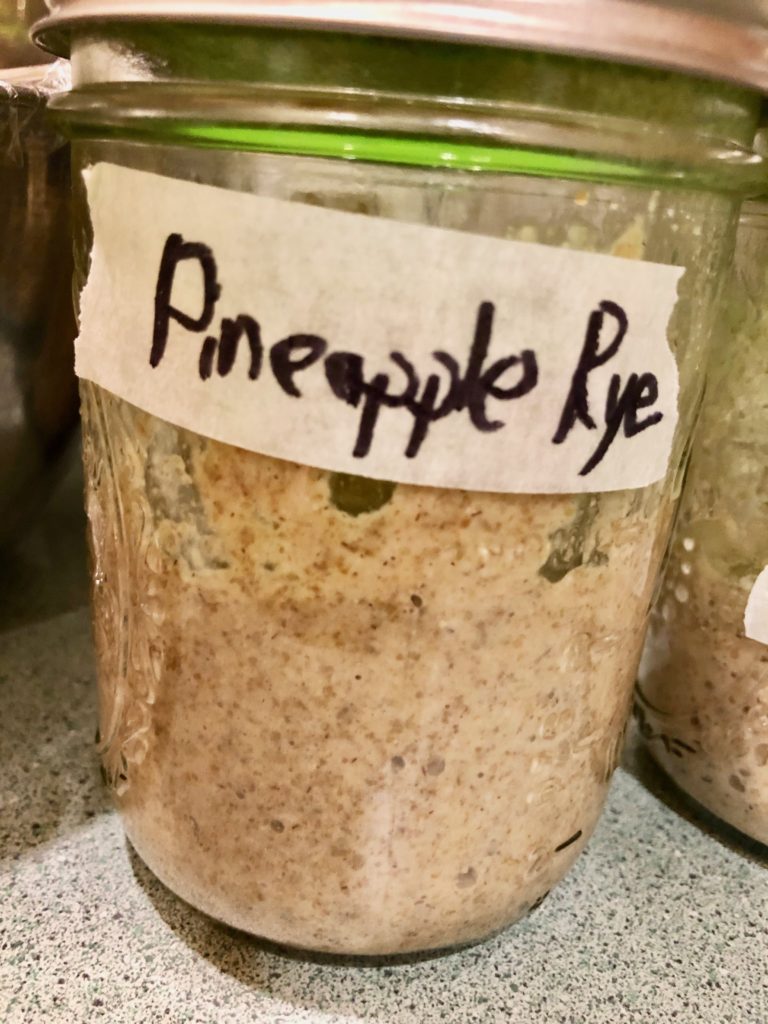
Cross-dressing for Dancing

I mentioned in my post about Celebration de Medici that I was surprised I hadn’t written about making that outfit… it turns out I did! I just never posted it. So here’s the post, originally written in 2020 about a project from 2018. Wibbly wobbly timey wimey stuff, I know. I’ve added commentary from 2024 in italics.

Introduction

Yet another project from 2018! This is the last one, finally.

The Academie Atlantienne de la Danse (of which I am Chatelaine) held a dance competition at the Kingdom Arts & Sciences Festival in February 2018. My canton decided to enter two versions of the dance Leoncello.  (You can watch our performance here. Ragna and I also danced an encore which you can see here.)

[I stepped down from the position of Chatelaine for the Academie when I stepped up as Minister of Arts & Sciences for my local group.]

I had been doing a lot of work on the evolution of 15th century Italian dance and wanted to showcase that. We picked Leoncello because it was the first dance I had traced like that as well as the fact that we had performed it a couple of years prior so we already had good familiarity with it. Leoncello was also one of the most popular dances of the 15th century. We can document it being danced for nearly a hundred years. We danced the original version by Domenico in 1455 and then the latest recorded version from 1517.

We decided as part of our performance to also include the clothing. We wanted to have group members to represent the evolution of clothing that happened over the course of the evolution of the dance. Several of the group members already had appropriate clothing for the end of the era, around 1500 to 1520. No one had outfits appropriate for when the dance was originally written around 1455. (Although the manuscript it is from was written in 1455 we believe Domenico created the dance some years prior to that.) So Ragna and I ended up dancing together and determining to be the couple in the earlier clothing, which meant that we needed to make pellandi. (Houppelande is the French term for this garment that was popular all over Europe in the 15th century. Italy seems to have abandoned it a lot sooner than Northern Europe as well.)

I decided to cross-dress and make a male outfit for the competition because, well, look at those guys: don’t you want to feel that fabulous too?

Inspiration images from Sienese frescoes – https://www.wga.hu/html_m/d/domenico/bartolo/pellegri/ – scroll down to “Feeding of the Poor (detail)” and look at the gentleman in blue.

The Layers

I cheated rather a lot on the bottom layer. I wore modern leggings because I didn’t have time to make hose. The men’s version of the camisa also generally had a different neckline than the women’s, but I already had this one so I wore it. The boots are the same modern ones that look vaguely appropriate that I wear with a lot of my garb.

The second layer is the farsetto or doublet. I forgot to take any in-progress photos. The fabric is just a linen I got from fabric-store. In order to pattern this we started from one of my gamurra bodice and sleeve patterns. (There were multiple guilds of tailors for different thins in Venice in the 15th century, however, the same tailors for mens doublets made womens gowns. Seemed a reasonable starting point.) We drafted the skirting panels based on a few images. For the sleeves I added width to the top half of my existing sleeve pattern and then gathered that into the regular bottom half. I am not certain how it would actually have fastened in this timeframe but hooks and eyes existed and seem logical. [I actually never got the hooks and eyes sewn on and it was pinned in place on the day of.]

The final layer is the pellando. I had the green/gold brocade in my stash. I think I was originally planning to make a giornea out of it, but I’m not sure it would have been enough fabric. I patterned this based on Cynthia Virtue’s houppelande patterning ideas. Some of the pellandi in the images from this timeframe appear to use a different construction method, with a yoke at the shoulders and then pleats below. The pleats were probably set in place with a tape behind them. If I ever make another I would like to try this method.

Ragna and I developed the sleeve pattern based on the images and some basic measurements of my arm, along with a lot of guess work. We were very pleased after we had already cut and started work on the sleeves to find other people’s patterns for this style of sleeve that matched ours, as well as images that showed the seam placement in the same place as what we had done. I did a lot of hand-finishing work on the sleeves. They are the only part of this that is fully-lined as we did not have enough of the brown velvet to line the whole garment.

Reflections

I liked how this turned out. We looked good together and everything really came together how I wanted it to with the pellando. Also, do you know how much stuff you can fit in those sleeves? I walked around with a water bottle in one sleeve and a sandwich in the other for a large chunk of the day. (Not a little sandwich, a hoagie.) I don’t know how much difference it really made to my dancing, although I felt bouncier than when wearing long skirts.

I wish I had had time to make a fabulous hat like the gentlemen in the frescoes. The hat I used worked but isn’t nearly as amazing. I think that’s my main regret about the outfit. [I substituted a green flat cap this time and it worked better than the other one I had in 2018 but I still want a fabulous hat for this outfit.]

2024 Reflections

I LOVED wearing this outfit again to teach dance at Celebration de Medici. The sleeves are fun, it still has full skirts for maximum swoosh but also you can see my legs as I explain how to do complicated steps! I may have mildly sprained my ankle jumping around like a fool because it really does inspire that kind of behavior.

I’m planning to make some mild modifications to the farsetto and make an actual appropriate under-shirt this year. I would also like to make a masculine giornea for warmer weather. That pellando is WARM. Overall, I think there’s a lot more masculine 15th century garb in my future.

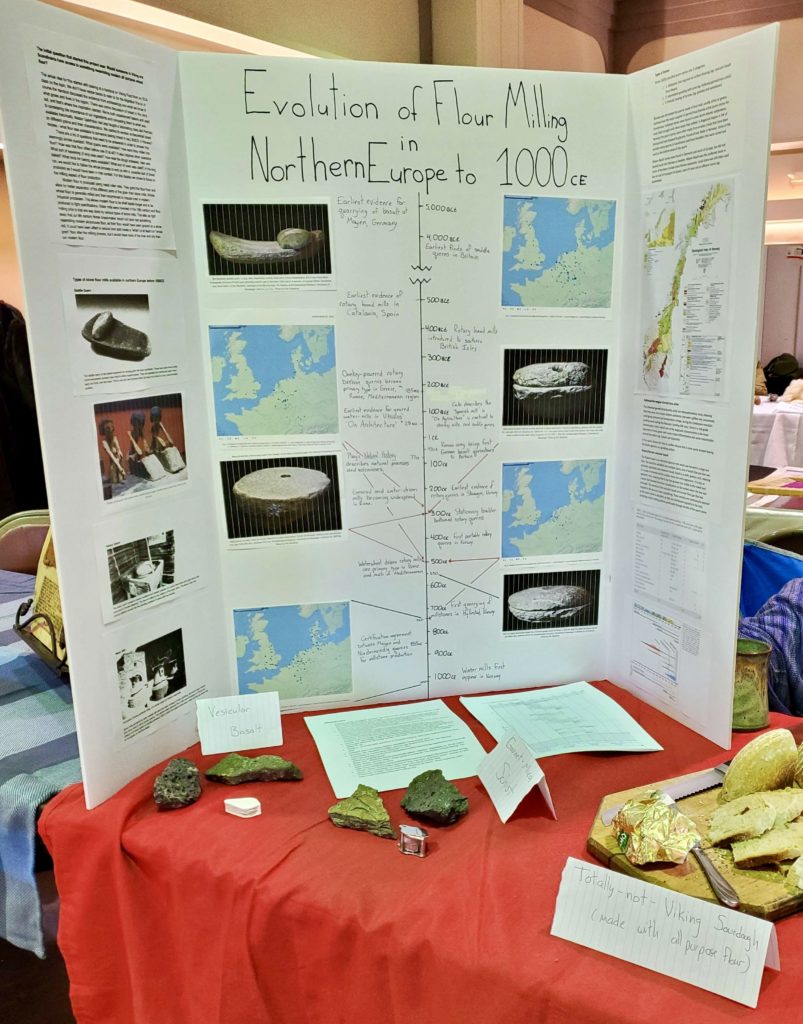
Display on Flour Milling for Kingdom Arts & Sciences Festival 2024

My display with Valla-Ragna in Spaka for KASF

This past Saturday Ragna & I displayed the first stage of our enormous research rabbit hole that started with a seemingly simple question about flour in Viking Age Scandinavia. In order to narrow our focus down to something manageable we chose to display what we’d learned about millstones specifically. Ragna even brought samples of the types of stone most valued for making millstones out of for people to pet! (I brought sourdough bread because of course I did.)

What follows is most of the text of our display.

Introduction

The initial question that started this project was: Would someone in Viking era Scandinavia have access to something resembling modern all purpose wheat flour?

The whole idea for this started with looking at a handout on Viking Food from an SCA class on the topic. We don’t have recipe books to refer to for the Migration Era so of course the handout discussed the evidence from archaeology and what we know of what grows and lives in the region. There was some discussion of bread in the hand out, and that’s where the inspiration started. We’re both experienced bakers and used to considering the importance of our ingredients and comparing them to what was available historically. Master Galefridus had also taught a fascinating class last Pennsic on different grains and their characteristics which provided inspiration as well. We started to wonder: what flour was available to someone baking bread in say, 800CE in Norway?

There are a lot of questions that need to be answered in order to answer this seemingly simple question: What grains were available? How were they milled into flour? How was that flour sifted before use (if at all)? It also inspires other questions: What sort of leavening (if any) was used? How was the dough kneaded, risen and baked? What tools for baking were available? What sort of oven was used? In the long run, we would like to follow the whole process to end up with a possible loaf of bread produced as it would have been in that context. For this display we chose to focus on the milling aspect of flour production.

Modern flour is produced using metal roller mills. They grind the flour finer and allow for better separation of the different parts of the grain than stone mills. Whole wheat flour is generally milled and then recombined to include bran in modern industrial processes. This allows modern flour to be shelf stable longer and to be produced to tight specifications. Roller mills were invented in the 19th century and flour milling prior to that era was done by various types of stone mills. This tells us right away that our 9th century Norse bread-maker would not have had something resembling modern all-purpose flour, as their flour would have been ground on a stone mill. It could have been sifted to reduce bran and create a “white” or at least not “whole grain” flour after the milling process, but it would have more of the bran and oils than our modern flour.

Types of stone flour mills available in northern Europe before 1000CE

Saddle Quern

The saddle quern is the oldest implement for turning grain into flour worldwide. These have been found pretty much everywhere humans have tried to refine husked grains. They are operated by rubbing the upper stone back and forth over the lower. This is not only hard physical labor but has to be done in a very uncomfortable position.

Rotary Quern

The rotary quern comes in several variations but always consists of a round lower stone and upper stone with some kind of handle attached. The flour is milled by the rotation of the upper stone. The stones often had groove patterns carved into the grinding surfaces to assist with the process.

Water Mill

Stone mills powered by water wheels still used the basic concept of rotary grinding, with much larger stones than were used in hand turned querns. The earliest water-powered flour mills were developed in Rome and Greece and were based on donkey-powered mills in which the bottom stone was a cone and the top stone was an hourglass or beehive shape.

Timeline

Note: our timeline includes Greek and Roman developments as there is some belief that milling technology spread from the Roman empire northward in Europe. However, milling technology such as saddle querns appear to have been simultaneously invented all over the world and there is evidence that rotary hand mills spread into Britain and then Scandinavia from Spain independent of Roman influence. This is an area of active historical research and discussion.

  • 5000 BCE – Earliest evidence for quarrying of basalt for millstones at Mayen, Germany
  • 4000 BCE – Earliest finds of saddle querns in Britain (also found elsewhere in the world at this time)
  • 500 BCE – Earliest evidence of rotary hand mills in Catalonia, Spain
  • 400 BCE – Rotary hand mills introduced to southern British Isles
  • 185 BCE – Donkey-powered rotary beehive querns become primary type of mill in Greece, Rome, Mediterranean region
  • 100 BCE – Cato describes the “Spanish mill” in “On Agriculture” in contrast to donkey mills and saddle querns used in Rome, it is believed to be a rotary hand mill
  • 25 BCE Earliest evidence for geared water-mills in Vitruvius’ “On Architecture”
  • 43 CE – Roman army brings first German basalt quern stones to Britain
  • 77 CE – Pliny’s “Natural History” describes natural processes and volcanoes
  • 200 CE – Earliest archaeological finds of rotary querns in Scandinavia in Stavanger, Norway
  • 200 CE – Geared and water driven mills becoming widespread in Rome
  • 300 CE – Finds of stationary boulder-bottomed rotary querns throughout Scandinavia
  • 400 CE – First portable rotary querns in Norway
  • 500 CE – Waterwheel driven rotary mills are primary type in Rome and much of Mediterranean
  • 700 CE – First quarrying of millstones in Hyllestad, Norway
  • 855 CE – Certification agreement between Mayen and Niedermendig quarries in Germany for Millstone production
  • 1000 CE – Water mills first appear in Norway

Types of Stones Used for Millstones

Strom (1820) classified quern stones into 3 categories:

  • Millstones that required no surface dressing (eg. vesicular basalt from Mayen)
  • Intermittent grinding with sand (eg.Hyllestad garnet/mica schist)
  • Periodic hewing of furrows (eg. granites and sandstones)

Norway was dominated by querns made of local rock, usually schist or gneiss. Hyllestad was the major supplier of garnet/mica/kyanite schist quern stones for Scandinavia. Hyllestad stones were found in some North Atlantic settlements, most likely brought with them when they settled. In Rogaland (region in SW of Norway) the quern stones were often made from erratics (rocks that have been transported and dropped by glaciers, found all over fields in Norway). Some of the earliest rotary querns in Scandinavia used local boulders that were carved and used as the bottom stone of the quern.

Mayen Basalt stones were found in Denmark and much of Europe, but did not extend much into Norway or Sweden. Mayen Basalt was the preferred stone in much of Northern Europe since Roman expansion. Local stone was still often used due to cost of transport of stones, even if it was not as efficient (eg.Sandstone).

Hyllestad/Norwegian Garnet/mica schist

The Hyllestad garnet/mica/kyanite schist are metasedimentary rocks, meaning that they were once ocean bottom sediments that were uplifted and compressed, undergoing pressure and temperature change, during the Caledonian mountain building event during the Paleozoic (starting 500 mya). Schist is a mid-grade metamorphic rock in which one of the diagnostic characteristics is the linear alignment of mica grains with some crystal differentiation and some metamorphic mineral formation (eg. Garnet and staurolite).

In the quern stones the mica is a softer mineral that is more easily abraded leaving the harder garnets as a grinding surface. 

Mayen/German vesicular basalt

The Mayen basalt is an extrusive igneous rock which was formed in a large lava flow. The lava flow solidified into multiple layers, one of which (the one that was primarily exploited) was columnar basalt. Basalt is a mafic igneous rock, meaning it is made of minerals which contain more iron and magnesium. It is also an aphanitic rock, meaning that it has fine grained (not visible to the naked eye) crystals that formed from fast crystallization on the surface when the lava was extruded. The vesicles in the vesicular basalt are formed from gas that was trapped in the lava as it was crystallizing. These vesicles are continuously exposed as the quern stone is abraded, as they are distributed regularly in the rock, providing a fresh cutting surface continually through the life of the quern stone.

Bibliography

https://www.bibliography.com/biblio/wQHoBb/

Conclusions / Next Steps

Our first conclusion as mentioned earlier is that modern all-purpose wheat flour is not a good substitute for stone-ground flour. I didn’t mention it on the display but one experimental study found that even the stone-ground flour with the highest rate of extraction had 3 times as much fiber & ash as similar flour ground in a roller mill.

We are continuing our research- at the moment I am looking into sources of information on sifting after flour was ground. We have also found some information on the grains available in Scandinavia and the cooking/baking implements and techniques based on archaeological finds. There’s also some research on finds of bread as a grave good that may give some insight. One of my biggest questions has been about whether leavened bread was even a common food item in Scandinavia at that time? Hopefully some of the archaeological reports we’ve gathered will shed light on that.

We are hoping to convince a friend of ours who works stone to make some quernstones of the right stone to play with. (He seems interested and there is garnet-mica schist in our region.) In the meantime, there are a few historic mills operating in the area that sell stone ground flours of a variety of grains. We are thinking of trying some comparative baking experiments with stone-ground vs roller-mill flour.

We plan to update and expand our display as we learn more. See you this time next year at KASF!

Helena & Ragna

Dances for “Celebration de Medici”

I had the pleasure of hosting dance for Caer Mear’s “Celebration de Medici” event on February 17th, 2024. What follows is my dance list and thought process in selecting dances for the event. I’ve linked descriptions for those dances I have uploaded on the site. (I know! I need to get the dance pages fixed.)

Introduction

Most of the dances that we know of from the 15th century come from the treatise of Maestro Domenico da Piacenza, written around 1455. Domenico’s primary patron was Leonello d’Este, Marquess of Ferrara but he was also a dance master for a very important connection of Cosimo’s, Francesco Sforza. Francesco was a condottiere who with the support of Cosimo took over the Duchy of Milan by marriage to the duaghter of Duke Visconti in 1450. We know that Maestro Domenico composed dances for the weddings of Francesco’s children in the 1450s. 

Another dance master strongly connected with the court of Francesco in Milan in this time was Guglielmo Ebreo. (He later converted to Christianity and changed his name to Giovanni Ambrosio). He wrote two treatises on dance, the first of which was from this same era in the 1450s. Much of it contains the same dances and other dances attributed to Maestro Domenico. I’ve included two of those  as well as one of his original choreographies. 

The marriages of Francesco’s children where these dances were performed created alliances between Milan and Naples.  Through this network of powerful allies, Cosimo created a balance of power in Italy between Florence, Milan, Venice & Naples that allowed for a time of (relative) peace in which the arts could flourish.

Set 1: Perfect Major

In music notation of the time, the terms perfect/imperfect and major/minor were used to denote the time signature of pieces. Perfect and major were triplet relationships, while Imperfect and minor were duplet relationships. The first set of dances I have nicknamed “perfect major”. This would be a 9/8 time signature in modern terms. All of these dances are for multiples of 3 people.

  1. Belfiore by Domenico, for lines of 3 people
  2. Jupiter by Domenico, for lines of 3 people
  3. Spero by Guglielmo, for 3 people in a row
  4. Gelosia by Domenico, for 3 couples

Set 2: Imperfect Minor

This set is called “imperfect minor” which would be a 2/4 time signature because all the dances are for 2 or 4 people.

  1. Petit Rose from Guglielmo but attributed to Domenico, for 2 people
  2. Lioncello by Domenico, for 2 people 
  3. Rostiboli Gioioso from Guglielmo but attributed to Domenico, for 2 people
  4. Anello by Domenico, for 2 couples

Set 3: Perfected Minor

These dances are versions for three people of dances for two we already learned.

  1. Lioncello Novo by Domenico, for 3 people in a row
  2. Gioioso in Tre by Giovanni Ambrosio, for 3 people in a row

Reflections

I really need some time to get the dance pages on here finished. I would like to have my work in reconstructing them which is currently spread out across multiple physical notebooks, Evernote, Google docs and emails in one place. I would to have short-hand and more in depth directions for each dance easily accessible. It would have been nice to easily copy-paste all that into a dance booklet for this event. I do have a hand-written notebook for these dances, where I have my shorthand versions to refer to when teaching my regular dance practice. That’s not great for a scenario like a ball.

On the day I had about 12 dancers join me, with varying levels of experience in historical dance. We did not quite follow my set-list as written. We did the first set, and then after the break dance Petit Rose and Rostiboli Gioioso from the second set, and then wrapped up with Gioioso in Tre. That was a lot in 2 hours!

I originally had the sets switched in order and also had 3 sets of 3 dances each. I rather wish I’d kept that plan … 4 dances in a set seems reasonable for a set if you can just do them, but when you are teaching every dance it is a lot. I also think Petite Rose would have been an easier introduction for the newer dancers.

Clothes!

Like many other people, I’ve had some weight and body composition changes since the coronavirus pandemic. Unfortunately that means that much of my finest 15th century Italian clothing does not fit any more. I have also not really been able to fix that problem since I was in a car accident last August and injured my wrist. I am only slowly returning to crafting as I am still going through physical therapy and treatment from my wrist surgery.

In light of all that, the idea of what to wear for this event was a bit terrifying!

But, I lucked out! My mid-15th century masculine outfit still fit pretty well after all. It was fun to dance in too!

2023 (and 2022…2021…2020) Wrap Up

Yes! I’m alive!

Last time I posted here was to review 2019 and plan for 2020. We all know how that went! Today’s post is a catch up on my arts & sciences projects since then. I’m going to organize by type not date.

Dance

I haven’t done much new dance research or reconstruction.

I did run a virtual dance practice monthly throughout 2020, which was a good way to get some social time in. In summer 2021 we held summer outdoor practices for a few months. Since then I’ve been trying to maintain a monthly practice in the face of changing meeting spaces and changing jobs (twice!). It’s a struggle.

I also co-ran a ball at Pennsic 50–Camp Flamingo Bluff sponsored a ball and I taught the first set. That was fun and nerve wracking. The Pennsic Dance tent is a A LOT of people to call and teach to, especially the first set of a well attended ball.

The team that led flamingo ball and our Sam.

I really need to fix and update the dance reference part of this website. Other than that, my dance related goal for 2024 is to take all my scattered notes on the 1517 German Letter dances and organize them and actually write something up from them. I will probably revisit and recheck my reconstruction at that point too.

Food

I’ve done a lot of cooking! When lockdown hit we were a few weeks out from Defending the Gate with a menu for feast that I had designed mostly on my own, themed around the battle of Pavia in 1525. The event was cancelled but the menu lived on. We went back to the research, refined it and ended up cooking it for Defending the Gate in 2022. You can cook the recipes – we posted them here.

In 2020 I also ran a virtual class on how to create your own sourdough starter (Starting Out, First Week, Maintenance). I’ve been doing sourdough baking since 2015 and had started my own culture, Mr Sticky, in 2018, so when everybody wanted to learn to bake with sourdough I figured I could help.

In 2021, we held a virtual Defending the Gate event to be able to invest our new baronage. Jasper and I designed a Virtual Potluck Feast for that event – something that people could cook at home and share a feast on Zoom. Jasper did a lot of the recipe write up on that one and I helped with finding historical references and sources. I still think it’s one of our cooler pandemic era ideas. You can still cook it here.

In 2023, Jasper and I co-planned the Defending the Gate feast themed around the siege of Otranto in 1480. This had an Ottoman cuisine inspired course and a southern Italian cuisine inspired course. I still don’t have the recipes written up and posted- so that’s one of my goals for 2024. We also ran the bagged lunch for Royal Archer which was mostly simple fare but I want to play with the dehydrator and jerky recipe more. (Drying my own herbs! It’s hard to do otherwise, the air is too dang humid here.)

This year we are running the Defending the Gate feast again, and the event is themed around the retaking of Otranto. So obviously I’ll be working on that menu as a major goal for 2024. Since the city was retaken by Spanish and Hungarian forces we have a lot of options to play with for dishes. It’s almost too hard to narrow them down.

I also have plans for a display at Kingdom A&S around the history of flour milling in northern Europe that I’m setting up with a friend. We got sucked into a research rabbit hole on millstones at Pennsic that has proven to be pretty fascinating. Certain stone was prized enough as millstones to be quarried from the same location for nearly a millennium and shipped all over Europe. More details on that forthcoming in March!

Eventually this project is going to turn into a larger display on bread in northern Europe, I think. We’ll see. I’ve found a lot of the information I need but I’m still stuck on a few pieces.

Clothing

My main sewing has been Roman lately. I’ve got a couple of reasons for this. One is that I decided that it would be cool and comfy for hot summer events in the southeastern US. Another is that I figure with Venice’s obsession with Rome, if my persona cosplayed anything herself, it would be a Roman matron. The last is that it’s forgiving of body changes.

I don’t have big sewing goals for 2024. I would like to finish my masculine 1450s Italian outfit so I can wear that for some dance events. (I am just realizing I never posted a dress diary for that one. Oops!) My summer Roman collection is pretty complete. I will probably be trying on a lot of my 15th century Italian and seeing what can be made to work with my current shape and size. It would be nice to finish the fancy heraldic Norse outfit I started embroidering ages ago, but I’m currently stuck on how to do one part. We’ll see.

Crafting (non period)

I’ve done a bunch of knitting and embroidery the last few years. None of it is really SCA period relevant though. I don’t really like early knitting, especially as it’s generally colorwork in the round on tiny needles. I have a lot of hand pain from the combination of small needles and narrow diameter circles. Still, knitting is a favorite anxiety reducing craft for me…

I have also rediscovered my enjoyment of embroidery lately. I haven’t really focused on period techniques, just been doing projects that amuse me and some presents/commissions.

Digital Art

I bought a new iPad and got the Apple Pencil and that has led to me rediscovering my enjoyment of digital art. I used to do a lot of it in college and then pretty much haven’t done any in the past decade.

Maintenance of a Mature Starter Culture

At some point you will have a starter culture that rises and falls predictably and you’ll be ready to switch to maintenance from creation. There’s a few approaches available here, ranging from ideal to lazy. I’ve used them all!

The Ideal Approach

The ideal approach is to keep your starter at room temperature and refresh it every day at the same time (or twice daily), adjusting your ratio of kept starter to water to flour so that it rises and starts to fall in the time in between refreshments. You do not want it to fall all the way back to flat in this time, or even most of the way back to flat. We are trying to encourage a particular balance of yeast and bacteria that is good for raising bread at this point. The longer you let it fall after the peak before refreshing, the more active the bacteria become and the less active the yeast become. Yeast are the ones who do most of the work of raising your bread, so you want your yeast colony to be strong and active.

When I say “adjust the ratio” what I am talking about is moving away from that 1:1:1 by weight of starter:water:flour we have been using to whatever ratio gives you the rise and fall times you want. If your starter has fallen most of the way back to flat by the time you refresh, then try going to 1:2:2. If it’s still rising and falling too fast, try 1:4:4. Keep experimenting until you get the desired rise and fall time. You will also want to be aware that changing seasons can change the ratios you need. In the heat of summer I have had to go as high as 1:10:10 to keep it from rising and falling too fast. (You can also change your water temperatures to influence this – use cooler water if the house is hot and warmer if it’s cold. Not too hot though!)

The good news is, even your starter has fallen back to flat before you refresh, you haven’t killed or ruined it. These cultures are hardy and you can keep baking with it. It might just be slower to raise your bread than you want, or have a more sour flavor than ideal. It will still make you bread.

The Lazy Approach

Let’s say you’re only baking once a week. Is it really worth it to refresh your starter 1-2 times a day? Are you going to bake with all that discard? Probably not.

So here’s what you do: Feed up your starter, let’s say with a 1:2:2 ratio, and stick it IMMEDIATELY in the refrigerator. (I see some recipes recommending leaving it out for a few hours first but that makes no sense.) The point of refrigerating it is that this will greatly slow down the activity of your yeast and bacteria, reducing the chance that they will die in their own waste while being ignored for a week or two. It will also prevent mold growth. You want it going in the fridge with little waste products and plenty to live off of for a week or two.

Then, a day or two before you want to bake again, take it out of the fridge. Assess the starter – is it full of bubbles and at a peak? Has it risen and fallen? Is there liquid on top? (The liquid is called “hooch” and can be tossed.) I like to leave mine out at room temperature and check on it in a few hours – if it’s active at that point, I can probably use it to bake right away. If it’s falling, then I will refresh it 1-2 times before baking with it OR use it to start a sponge for a longer-fermenting bread recipe.

What I do

I take sort of a middle ground approach between the two. If I am baking regularly, I keep Mr Sticky out on the counter. If I’m going to be busy and not baking regularly, he goes in the fridge. I also like to refresh Mr. Sticky at fairly extreme ratios so that even on the counter I can go to an every other day schedule without harming the culture. When I refresh Mr Sticky is often based on a visual check more than anything else. (I only keep .2 oz of starter and refresh at 1:5:5 in the winter and 1:10:10 in the summer. I would not start this until you have an established starter culture and are comfortable with maintenance.)

Further Reading

Websites

Books

Flour Water Salt Yeast by Ken Forkish is pretty much the seminal work on artisan bread techniques, including sourdough.

The Rye Baker by Stanley Ginsburg is my personal favorite bread book – I love rye bread and he does a fabulous job in this book! He discusses the history of rye cultivation, the microbiology and chemistry of why baking with rye is NOT the same as baking with wheat, regional variations in traditional bread recipes across Europe and the ingredients used in bread with such clarity. It’s also chock full of delicious and well-written recipes. The Sauerkraut Rye bread from that book has become a staple in my household that people regularly demand.

Once my baby starters are ready to bake with there will be another post and videos too 🙂

How to Sourdough from Scratch: Days 3-6 and what to do next

Recap of Days 1-2 here. This got long so I made you a Table of Contents. There will be a follow-up post on maintenance of a mature starter and another on baking with it once my baby starters are ready.

Table of Contents

Day 3

Saturday, April 4th

Starters on Day 3

Starter 1 (wheat) was very active with large bubbles; it smelled clean and unlike any of the unwanted bacteria I was concerned about. This is a good sign. It probably took 24 hours for it to rise and and fall partway. I added 1 oz whole wheat and 1 oz water as before.

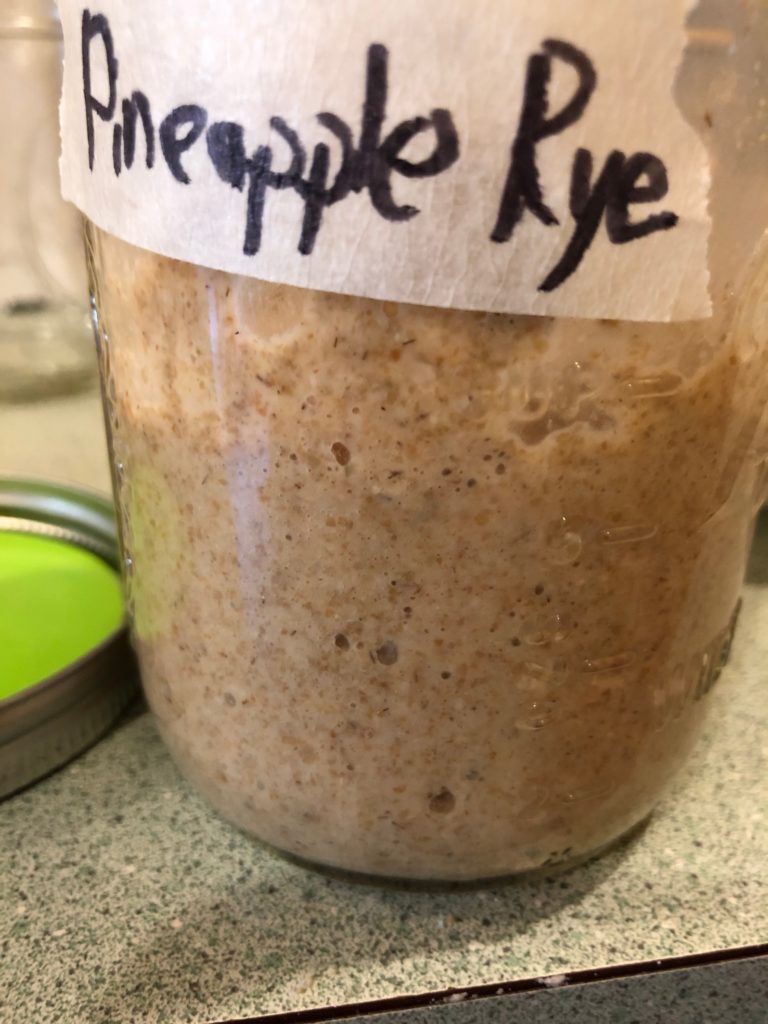
Starter 2 (pineapple rye) was less active. There were small bubbles visible but not much of a rise and fall. I wonder if this rye flour is just less nutritious than the one I normally use (which is completely out in all the grocery stores around here). Mr Sticky has had smaller bubbles than usual and 50% of what I maintain him with is also this same rye flour. I added 1 0z whole rye flour and 1 oz pineapple juice as before.

Day 4

Sunday April 5th

starters on day 4
close up on the pineapple rye

Starter 1 (wheat) was very active again and still smelled clean. I added 1 oz water & 1 oz whole wheat flour as before.

Starter 2 (pineapple rye) again showed less activity, but did have small bubbles. I added 1 oz pineapple juice and 1 oz whole rye flour as before.

Day 5

Monday April 6th

starters on day 5

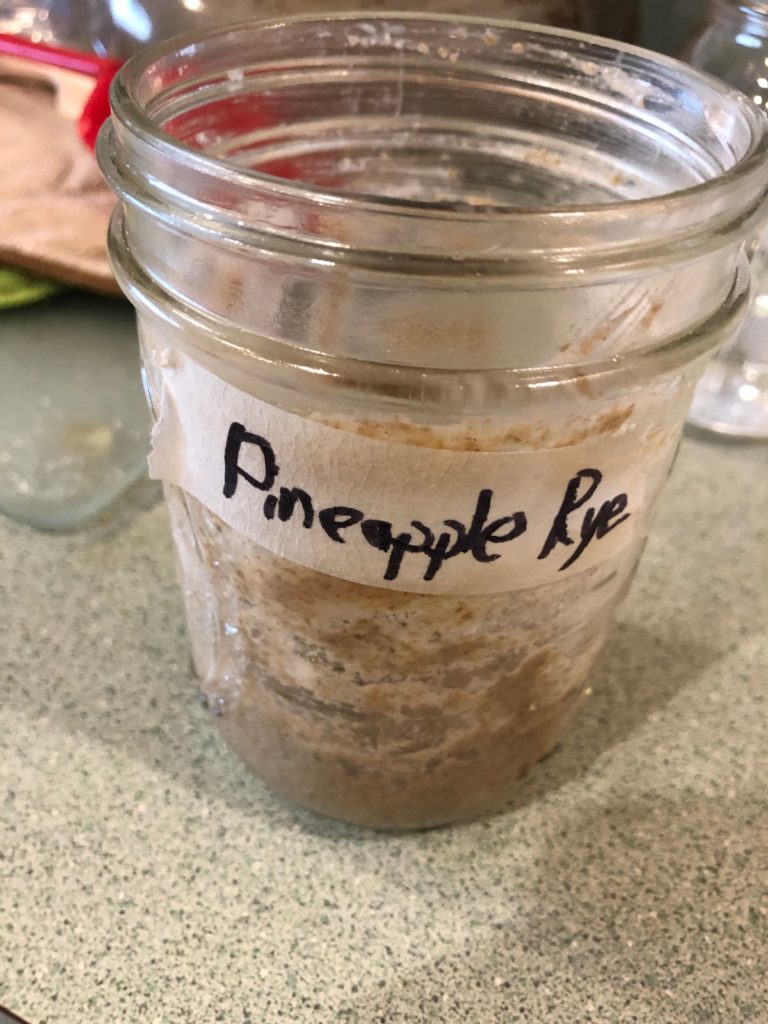
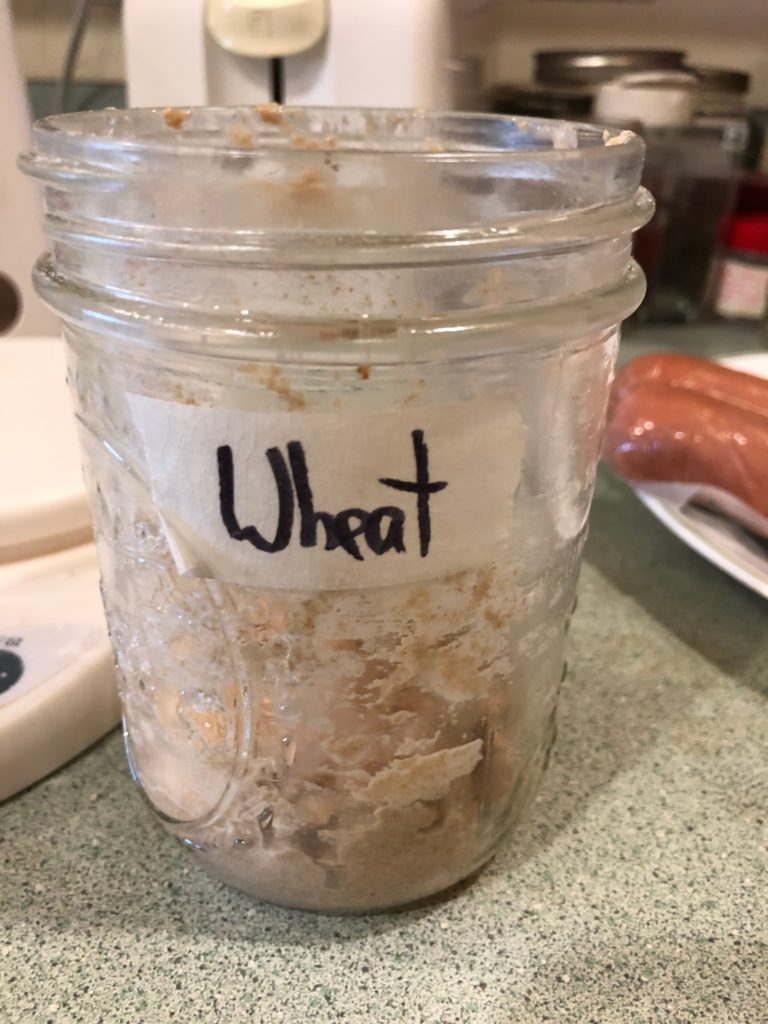
Starter 1 (wheat) was very active again and still smelled clean. Starter 2 (pineapple rye) again with the small bubbles. The pineapple juice method is not working as a jump start for me so well.

At this point I would like to reduce the volume of starter in the jar and reduce the waste products the new colonies are in a little bit. Notice that bit of liquid under most of the wheat starter? It’s been producing extra liquid a lot. That’s a waste product from the yeast and if you let it build up eventually they will die in their own waste. (Do you want to live in your own urine and feces? I didn’t think so.) We left the waste products in for the first few days because we wanted the acid the lactobacilli were making to alter the ph of the overall environment to encourage our yeast to activate.

I tossed out a large portion of both baby starters. Starter 1 (wheat) I retained 1 oz, to which I added 1 oz whole wheat flour and 1 0z water. Starter 2 (pineapple) I retained 1 oz, to which I added 1 oz whole rye flour and 1 oz WATER. You’re not going to use pineapple juice forever.

Day 6

Tuesday April 7th

I have not yet refreshed the baby starters. (Mr Sticky was fed up for refrigeration and put away yesterday after I got a dough going from him.) They both show only very small bubbles – I may have gone a bit overboard in how much I removed yesterday. I also refreshed them pretty late yesterday so I’m going to wait and see what they are doing after dinner. I may just add to them if they haven’t really gotten as active as I’d like.

Recommendations for the next week

Keep refreshing your starters every day around the same time. At this point, you do want to remove some of your existing matter when you refresh. I recommend a 1:1:1 ratio by weight for now- so if you save 2 oz of starter, add 2 oz of flour and 2 oz of water. For now, I wouldn’t go below 1 oz saved, and 2 oz is probably better.

If you are seeing activity (bubbles, a clear rise and fall) then you are moving towards a ready culture. You may want to move to twice daily refreshments if the peak of the activity is happening quickly and your starter is mostly fallen back down to flat by the time you’re ready to refresh. (Temperature will strongly affect this. If your kitchen is over 75*F I highly recommend twice daily refreshments.) Your goal is to be refreshing not long after the peak, definitely before it’s all the way back to flat.

Assess your culture by checking the smell. It should smell like flour, a little sour (from the acid) and little funky from the yeast. If you’ve had an unfiltered wheat beer or brewed you probably know what the yeast funk I’m talking about is. Mr Sticky has particular smell that I call “feety but good” when it’s active. Foul smells can indicate unwanted bacteria and a culture that is not ready yet.

You can also start to mix in some all-purpose flour at this point rather than maintaining on all whole-grain. My personal preference is not to go below 50% all-grain flour at any time, but plenty of people maintain their starter cultures completely on AP flour. I would wait until you have a predictable rise and fall to switch over completely from whole-grain to all purpose.

What about all that stuff I’m tossing?

At this point you most likely do not have unwanted bacteria (check the smell) and you can actually use that extra starter mass instead of throwing it out. It can add a sour flavor to a baked good (although it’s probably not powerful enough to give it a full rise yet). I like King Arthur Flour’s recipes for sourdough discard, especially these biscuits. If you refrigerate your discard you can save it for up to a week, so you could keep a big jar of discard that you add to until you have enough for a discard recipe. (DO NOT leave it out at room temperature – it will be invaded by MOLD!) I have done this occasionally.

When will it be ready to bake with?

The big question! What you want to see is activity in the form of bubbles and a clear, predictable rise and fall cycle. Refreshing at 1:1:1, twice daily, you want to see this rise and fall cycle happen within 12 hours. If you have this, and it doesn’t smell rotten, you are probably good to bake!

So what to bake? This will really depend on what flour you have available, your previous bread baking experience and comfort, and the equipment you have available. I plan to do another post with video about baking with sourdough when my baby starters are ready to go. In the meantime, if your starter is roaring to go, try this Rustic Sourdough Bread recipe from King Arthur Flour. It should work with any wheat flour you have on hand.

Go forth and sourdough!

Recap: How to Sourdough from Scratch Days 1 & 2

Note about the videos -these are the Facebook live videos I did, with minimal editing.

Day 1

Thursday April 2nd we started 2 baby sourdough starters. Starter 1: 1 oz whole wheat flour mixed with 1 oz water. Starter 2: 1 oz pineapple juice mixed with 1 oz whole rye (pumpernickel) flour. (Here’s my source for the pineapple juice idea.) The first several days we will add the same ratio of flour/water or flour/juice to the starter without removing any material.

Each starter was mixed in a 16 oz mason jar with a fermentation lid. If you don’t have fermentation lids, a regular lid on loosely works just fine.

We are trying to get the microorganisms present in the flour to wake up and eat and reproduce, however we don’t want all of them. Some bacteria we do not want may show up at first – if you have bubbles and a bad smell it is those bacteria. What we are waiting on is some lactobacteria to start going, because they produce acids as they eat the flour. We are not removing material because we want the whole mush to become acidic in order for the yeasts we’re looking for to activate. The yeast species that show up in sourdough starters tolerate more acidity than your standard store-bought yeast (candida millieri). Eventually that acidity will kill off the other bacteria and you’ll end up with a stable culture combining yeast and the lactobacteria.

Day 2

Friday April 3rd: Neither Starter 1 or Starter 2 had shown any signs of activity after 24 hours. The house was cold last night so I’m not surprised. If you are worried that you’re not seeing activity, you may try putting your starter in a warmer place or on a heating pad. Just don’t let it get too hot – the ideal temperature is 80*F and I wouldn’t get it over 100*F (although you won’t definitely kill everything until about 140*F).

I added 1.25 oz water and 1 oz whole wheat flour to starter 1 & 1.5 oz pineapple juice and 1 oz rye flour to starter 2. The additional liquid is because I noticed not all the flour was hydrated last night. We need all the flour to come into contact with the liquid. This activates some enzymes in it that will start a breakdown of some of the complex molecules into forms more readily eaten by the yeast and bacteria we are trying to grow.

Days 3 and 4

Saturday and Sunday we will keep the same feeding regimen and I will report back on Monday with the progress of the starters!

Online Course: How to Sourdough from Scratch in a Time of Plague

I asked around on the Book of Faces and there seemed to be a lot of interest in this, so here goes a complete experiment! I’m going to use a combination of text (blog posts here) and video (facebook? youtube? still figuring it out!) to teach you what I know about sourdough starters and bread baking.

Goals

By the end of this course, you should be able to…

  1. Start a successful sourdough starter from only flour and water*.
  2. Maintain a sourdough starter, both when you are using it regularly and when you are not.
  3. Bake a loaf of bread with your own starter.

*Although we will also try the water, flour and pineapple juice method. Grab some pineapple juice if you want join in on that experiment.

Requirements

I am trusting that everyone who chooses to do this has a basic level of understanding how to use their kitchen safely. Other than that you need to have:

  • Flour*
  • Water
  • A container for your starter with a lid
  • A stirring implement
  • A kitchen scale that can measure in grams or tenths of an ounce
  • A bowl to mix in
  • A functional oven
  • A baking pan, small dutch oven, or loaf pan

Flour! Flour is the most important ingredient when starting your starter from scratch. You will want to have 2 flours on hand: all purpose flour and a whole grain flour. Your all-purpose wheat flour needs to be unbleached. For the whole-grain flour, either a whole-grain wheat or rye will work. (Organic flour is helpful but not necessary.) We will only be using a few ounces of flour at a time until we are actually baking bread, so a small bag of each flour should be fine.

Sound interesting? Sign up for the event on facebook. It won’t start until Wednesday, March 25th because I want you to have time to get supplies.

Composing the Music of “Fettuccine for Five”

In spring 2019 I choreographed a dance in the style of 15th century Italian balli. This dance, Il ballo d’Eleanor con quatro Fettuccie per Cinque, or Eleanor’s Ribbon Dance for Five, was inspired by a friend and regular to my dance practice as well as by watching some people dance the existing ribbon dance, Tesara. I’ve already written about the process of creating this dance on this blog, and there is now a page here with directions and music for it. I thought I would tell you more about the thought process of composing the music for this dance.

My main goal was to write something very danceable and earwormy – something the dancers would sing the steps to and find themselves humming afterwards. I wanted my dance to have several sections using the different misura, much as the balli of Masters Domenico and Ambrosio do. With that in mind, I choreographed the dance with sections that would work in quaternaria, bassadanza and saltarelli misure and then came up with tunes for each. (These were 3 of the 4 commonly used time signatures in 15th century Italian dance music, roughly equating to modern 4/4, 6/4 and 6/8.)

In creating my tunes I thought about what I knew of medieval vs modern music theory and the fact that the 15th century was very much a time of slow transition out of medieval modes towards the more modern understanding of music. I wanted the tune to reflect that transition, as well as modes/keys commonly used in 15th century dance music. To help with that, I composed on my gemshorn, an instrument of the time rather than on my modern flute or baroque recorders. I also played through several existing melodies of 15th century dances before I started, trying to put my mind in the right framework.

Composing the 3 Melodies

Section A – 4/4 or quaternaria misura

Quaternaria was used a lot in the balli, including for sections where the steps were piva, even though piva technically has its own misura. I chose to do this rather than create a piva misura melody. Initially, I tried to compose this melody in F major (relative to the D minor melody I already had for the B section), but it just did not want to resolve into something I liked. I started noodling on my gemshorn in D major and somehow having the F# made it work. I don’t know, sometimes tunes just want to be in a certain key.

D major was less common than F major in 15th century dance music but not unknown. (F major was used as F Lydian but in the 15th century even though they called it Lydian, they regularly made the B flat anyway.) It was very popular in Baroque music, so in a way this section is looking forward to where the music was going.

The tune is supposed to be happy and bouncy to go with the piva steps mostly done to it. The version marked descant is what I originally wrote, and then when I started arranging I decided that I wanted a melody that would be easier to pick up and sight read. That melody still gets the main idea and the bouncy feel across but should be more doable for a dance band that hasn’t encountered this music before.

Section B – 6/4 or bassadanza misura

The bassadanza was known as the “queen of measures” and was the slowest of the misure as well as being seen as the most refined. Although there was a genre of dances entirely in bassadanza, it was also used in the mixed-tempo balli. The melody for this section came to me first – we often sing what we are doing to the tune of a dance and in the first use of this melody Eleanor does a voltatonda del gioioso, which she refers to as the “really slow and boring turn”. I sung that to myself and it became the origin of the B melody.

I wanted the bassadanza section to particularly reflect the medieval origins of the music, and so I chose to push back against my initial instinct to focus on thirds and instead emphasize the fourth and the fifth in the D minor scale that it decided it wanted to be in. This is why it jumps from D to A. (I guess because a “slow and boring” turn shouldn’t be major?) It could also technically be in the medieval Dorian mode, because although standard Dorian has a B natural, it could be flat at times.

Unlike the quaternaria section, my initial melody is what became the main melody. I actually wrote the descant for this section last, after having done most of the arrangement. I wasn’t completely sure that it needed a descant, but I remembered that that was very common for bassadanza music. In fact, often the tenor part was what was written down and the soprano instrument improvised a descant based on that. I looked over the few bassadanza melodies that we do have to get ideas for the descant on this one.

Section C – 6/8 or saltarelli misura

Saltarello misura, along with piva misura, was considered one of the “historical” or “common” tempos- something that everyone knew how to dance to automatically. It was less refined than bassadanza. Saltarello misura might be written in the equivalent of 6/8 or 3/4 and often had more syncopated rhythms than quaternaria. I decided to put this melody in the same key as the A melody. This one came to me pretty quickly as I was noodling around once I decided on a key because I knew the bouncy feel that I wanted. Like with the quaternaria section, the initial melody that I wrote is what became the descant, and then I created a slightly simplified melody from that for ease of sight reading.

A lot of the balli that switch between misura will include an extra measure or half measure at the beginning of the saltarello section for the dancers to do a little hop and prepare for the saltarello step, especially if it is switching from the slower bassadanza misura. I chose to write a full measure introduction for the saltarello section for that purpose.

Arrangement

In arranging this, I wanted to bring in a medieval feel to the harmonies at times and not solely rely on modern arrangement strategies. I also wanted to use the harmony and bass instruments to provide rhythm to cue the dancers, which is what would have been done in period as dance ensembles often did not have a drum. A lot of ensemble music that would have been played for dancing would have used a lot of straight octave differences between instruments more than the chord-based modern use of harmony. I used a mixture of both, but made sure to emphasize the octave in opening and closing of many of the sections, especially having unison play at the end of the whole dance.

Further Reading

Jennifer Nevile: The eloquent body: dance and humanist culture in fifteenth-century Italy. If you want to understand more about the 4 misure or time signatures, Nevile’s book is the key that really unlocked my understanding of it. This is an expansion of her work for her doctoral dissertation.

“Fettuccine for Five” News

I will be teaching the dance I wrote last spring at Atlantian University tomorrow. In preparation for that, I have started to post more information about in on this site. It now has a page of its own! You can find directions (including in Italian), the score and mp3 for the music and more there. I have also added the handout for my class to the Class Notespage.

In February, I will posting another blog post about Fettuccine for Five, telling you about the process of composing and arranging the music. In March, I will be posting videos of the Canton of Sudentorre dancing it.

Come learn this very silly dance and get the music I wrote stuck in your head!